-
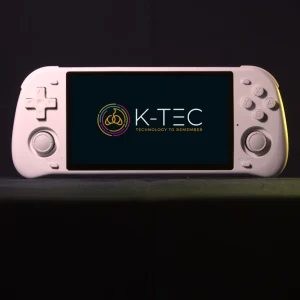
 PowKiddy RGB10 Max 2 retro handheldPrice range: £129.90 through £149.90
 -
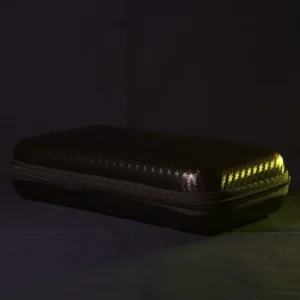
 Hardshell case for PowKiddy RGB10 MAX 2 or Anbernic RG503£15.90
Tuning
We have used our expert knowledge to tune the configuration of your PowKiddy handheld. If you discover other tips or configurations that enhance your experience, please use the contact form to let us know. Here’s a list of the changes we’ve made.
microSD cards
The microSD cards that PowKiddy usually supplies with its handhelds are unbranded and we are not satisfied with their reliability. Therefore, we ship these devices with brand-name microSD cards.
We are so confident about the quality of these cards that we provide a lifetime guarantee.
It’s important to make a backup
Even with the lifetime guarantee we give our microSD cards, it is still recommended that you backup your card(s) as soon as you receive your device. See How to backup your retro handheld’s microSD card(s)
Firmware
We have replaced the stock firmware with the RetroOz custom firmware, which is itself based on ArkOS. In our testing, RetroOz provided excellent balance between ease of use and performance. We have further refined the configuration of the firmware with settings specific to the RGB10 MAX 2.
N64
Use the Standalone-Rice emulator
Standalone-Rice performs better on this device than the default Parallel-N64 retroarch core.
To try a different emulator, see Hints -> Trying different cores/emulators in this guide.
Configure the button-mapping for use with Standalone-Rice
Without configuration, this emulator uses an incomplete and uncomfortable mapping for the inputs. We have configured the inputs to match the common layout used for N64 emulation (L1 used for L-targeting, right analogue-stick directions used for C-inputs).
PSP
We have configured PSP to use the stand-alone PPSSPP-GO emulator. This runs in widescreen and performance is just good enough for games to be playable.
We have configured settings, such as frame-skipping, to provide the best performance available on this device. The menu used to alter these settings can be shown by using the SELECT + X hotkey.
You may find that games stutter a few times when playing a new level. This should happen less as you progress through that level, due to caching performed by the emulator.
PSP pushes the limit of what this kind of device can emulate, but our configuration gives you the best available experience.
GameBoy
Set the screen colour to a light green, matching the original GameBoy display
If you would like to try a different colour palette, bring up the Retroarch Quick Menu while in-game (SELECT + X), then going to Options -> Internal Palette.
Save the changes by going back up a menu level (press B) until you see the Overrides item; then select Overrides -> Save Current Directory Overrides.
Dreamcast
We have set the core used for emulation to retrorun-wide, in order to enable widescreen gameplay on this device. To try a different emulator, see Hints -> Trying different cores/emulators in this guide.
We have used PAL versions of Dreamcast ROMs, where available. When given the option, please select 50Hz. This allows more Dreamcast games to run at full-speed.
All Retroarch cores
Shaders
We have configured shaders to improve the display of retro games on your RGB10 MAX 2’s high-resolution screen.
Set the aspect ratio to Core Provided
This tells Retroarch’s cores to conform to the shape of each device’s original screen shape, preventing games from appearing squashed.
Arcade games
A number of arcade games were designed for use with a portrait-format screen. Our configuration will flip these to use vertical mode. We have also mapped the controls so that you can use the analogue stick and buttons that will be at the bottom of the device as you’re holding it.
Ports
Ports are games that have been ported to run natively on your device.
Hints
Position of SELECT, START buttons
By default, your handheld uses the buttons at the bottom of the device as the SELECT & START buttons. You may find it more natural to use the buttons in the corresponding position at the top of the device.
You can change between having SELECT & START at the bottom or top of the device by going into the menu at Firmware Options -> Device and select RGB10 MAX 2 either Native or Top. Do not select a device other than the RGB10 MAX 2.
NOTE: The Nintendo 64 emulator, Mupen64plus-Rice, is configured always to use the buttons at the top of the device. The bottom SELECT button is configured as the N64’s reset button.
Hotkeys
Note
L3 is the button function (click it) of the left-hand analogue stick; R3 is the same for the right-hand stick.
| Action | Hotkey |
| Safe power-off | POWER (short press) |
| Quit game | SELECT + START twice (once for some stand-alone emulators) |
| Add favourite | Y when in game list |
| Remove favourite | Y when in favourites list |
| Retroarch quick menu | SELECT + X |
| Retroarch quick save | SELECT + R1 |
| Retroarch quick load | SELECT + L1 |
| Retroarch fast forward | SELECT + R2 (hold) |
| Retroarch rewind | SELECT + L2 (hold) (can undo a small fail) |
Turning off the device
Power button
A short-press of the POWER button will safely power-down the device.
Using the menu
Press START, then go down to Quit, and choose Shutdown System.
Hard shutdown or reset
If the device crashes and neither of the previous two methods work, you can perform a hard shutdown by holding the POWER button. Similarly, you can press the RESET button to perform a hard reset.
You should use these only as a last resort, as they risk data corruption.
Note
Your PowKiddy device is a handheld computer and, as such, should be powered down in a safe manner. Otherwise, there is a risk of data corruption.
Quitting a game
When using a retroarch core
Most systems are emulated using Retroarch cores.
You can press SELECT + START on the device, twice in quick succession, to quit a game.
Standalone emulators and Ports
Some systems use stand-alone emulators. These include N64, PSP, Dreamcast, and Nintendo DS. Pressing SELECT + START once will quit most of these. Most Ports are quit using the same method.
Nintendo DS: The Nintendo DS emulator (Drastic) is quit by using its menu. You can display the menu by pressing L3. The text is tiny but the last menu option is the one you use to quit.
Sleep
Your PowKiddy handheld can be put into sleep mode by pressing the two function buttons on the right of the device at the same time (the button labelled START and the corresponding button at the top). If you press the POWER button, the device will quickly return to the state it was in before entering sleep mode.
This mode drains the battery at a very slow rate. However, we don’t recommend leaving your device in sleep mode for days at a time. It will eventually run out of battery and the unsafe shutdown may result in data corruption.
Show the Retroarch menu
Select RETROARCH from the main menu and then either retroarch or retroarch32. These are 64-bit and 32-bit versions of the software, respectively. The available game systems are configured to use the 32-bit or 64-bit depending on which happens to work best for that system.
To bring up the Quick Menu, press SELECT + X while in-game.
Updating retroarch cores
This requires an internet connection and is, therefore, only possible when Wi-Fi is enabled and connected.
You can update to the latest version of the installed Retroarch cores by going to Retroarch from the main menu, then selecting Online Updater -> Update Installed Cores.
Important
We cannot guarantee that the updated cores will run as smoothly as those that come pre-installed. Similarly, they may have improved performance or they may have worse performance. Additionally, this process is likely to upgrade the fbneo core which can make some arcade games incompatible. The process of downgrading troublesome cores is more involved and is beyond the scope of this guide.
Screen-saver
After several minutes of sitting idle, your handheld will start playing videos of random installed games. This is the screen-saver. To play the game currently displayed, press START. To exit the screen-saver, press one of the face buttons.
Trying different cores/emulators
To try a different emulator for a specific game, press SELECT on the game list screen, then choose Edit this game’s metadata -> Emulator.
Nintendo DS
Nintendo DS uses the stand-alone emulator, Drastic.
Games that do not use touch-screen input are the most usable.
Screens and menu
| Button | Function |
L3 (press down on left analogue stick) | swap screens |
R3 (press down on right analogue stick) | dual/single-screen toggle |
A | press selected button on touch-screen |
L1 | touch the screen at stylus location |
SELECT | bring up the Drastic menu |
START | quit the game immediately |
Glossary
- RetroOz
- This is the Operating System that runs on your PowKiddy retro handheld device. It’s a version of Linux that’s been streamlined to run emulators most efficiently.
- Retroarch
- Retroarch provides most of the cores/emulators that run games. The Retroarch menu is used to configure its cores.
- Core
- A Core is an emulator that has been adapted to work with Retroarch.
- Emulator
- Using an emulator, your device pretends that it’s a different device. For instance, using the PPSSPP emulator, your PowKiddy retro handheld pretends that it’s a PlayStation Portable. It can then run games designed for the PSP. Some devices are more difficult to emulate than others, such as the Nintendo 64 or Sega Dreamcast.